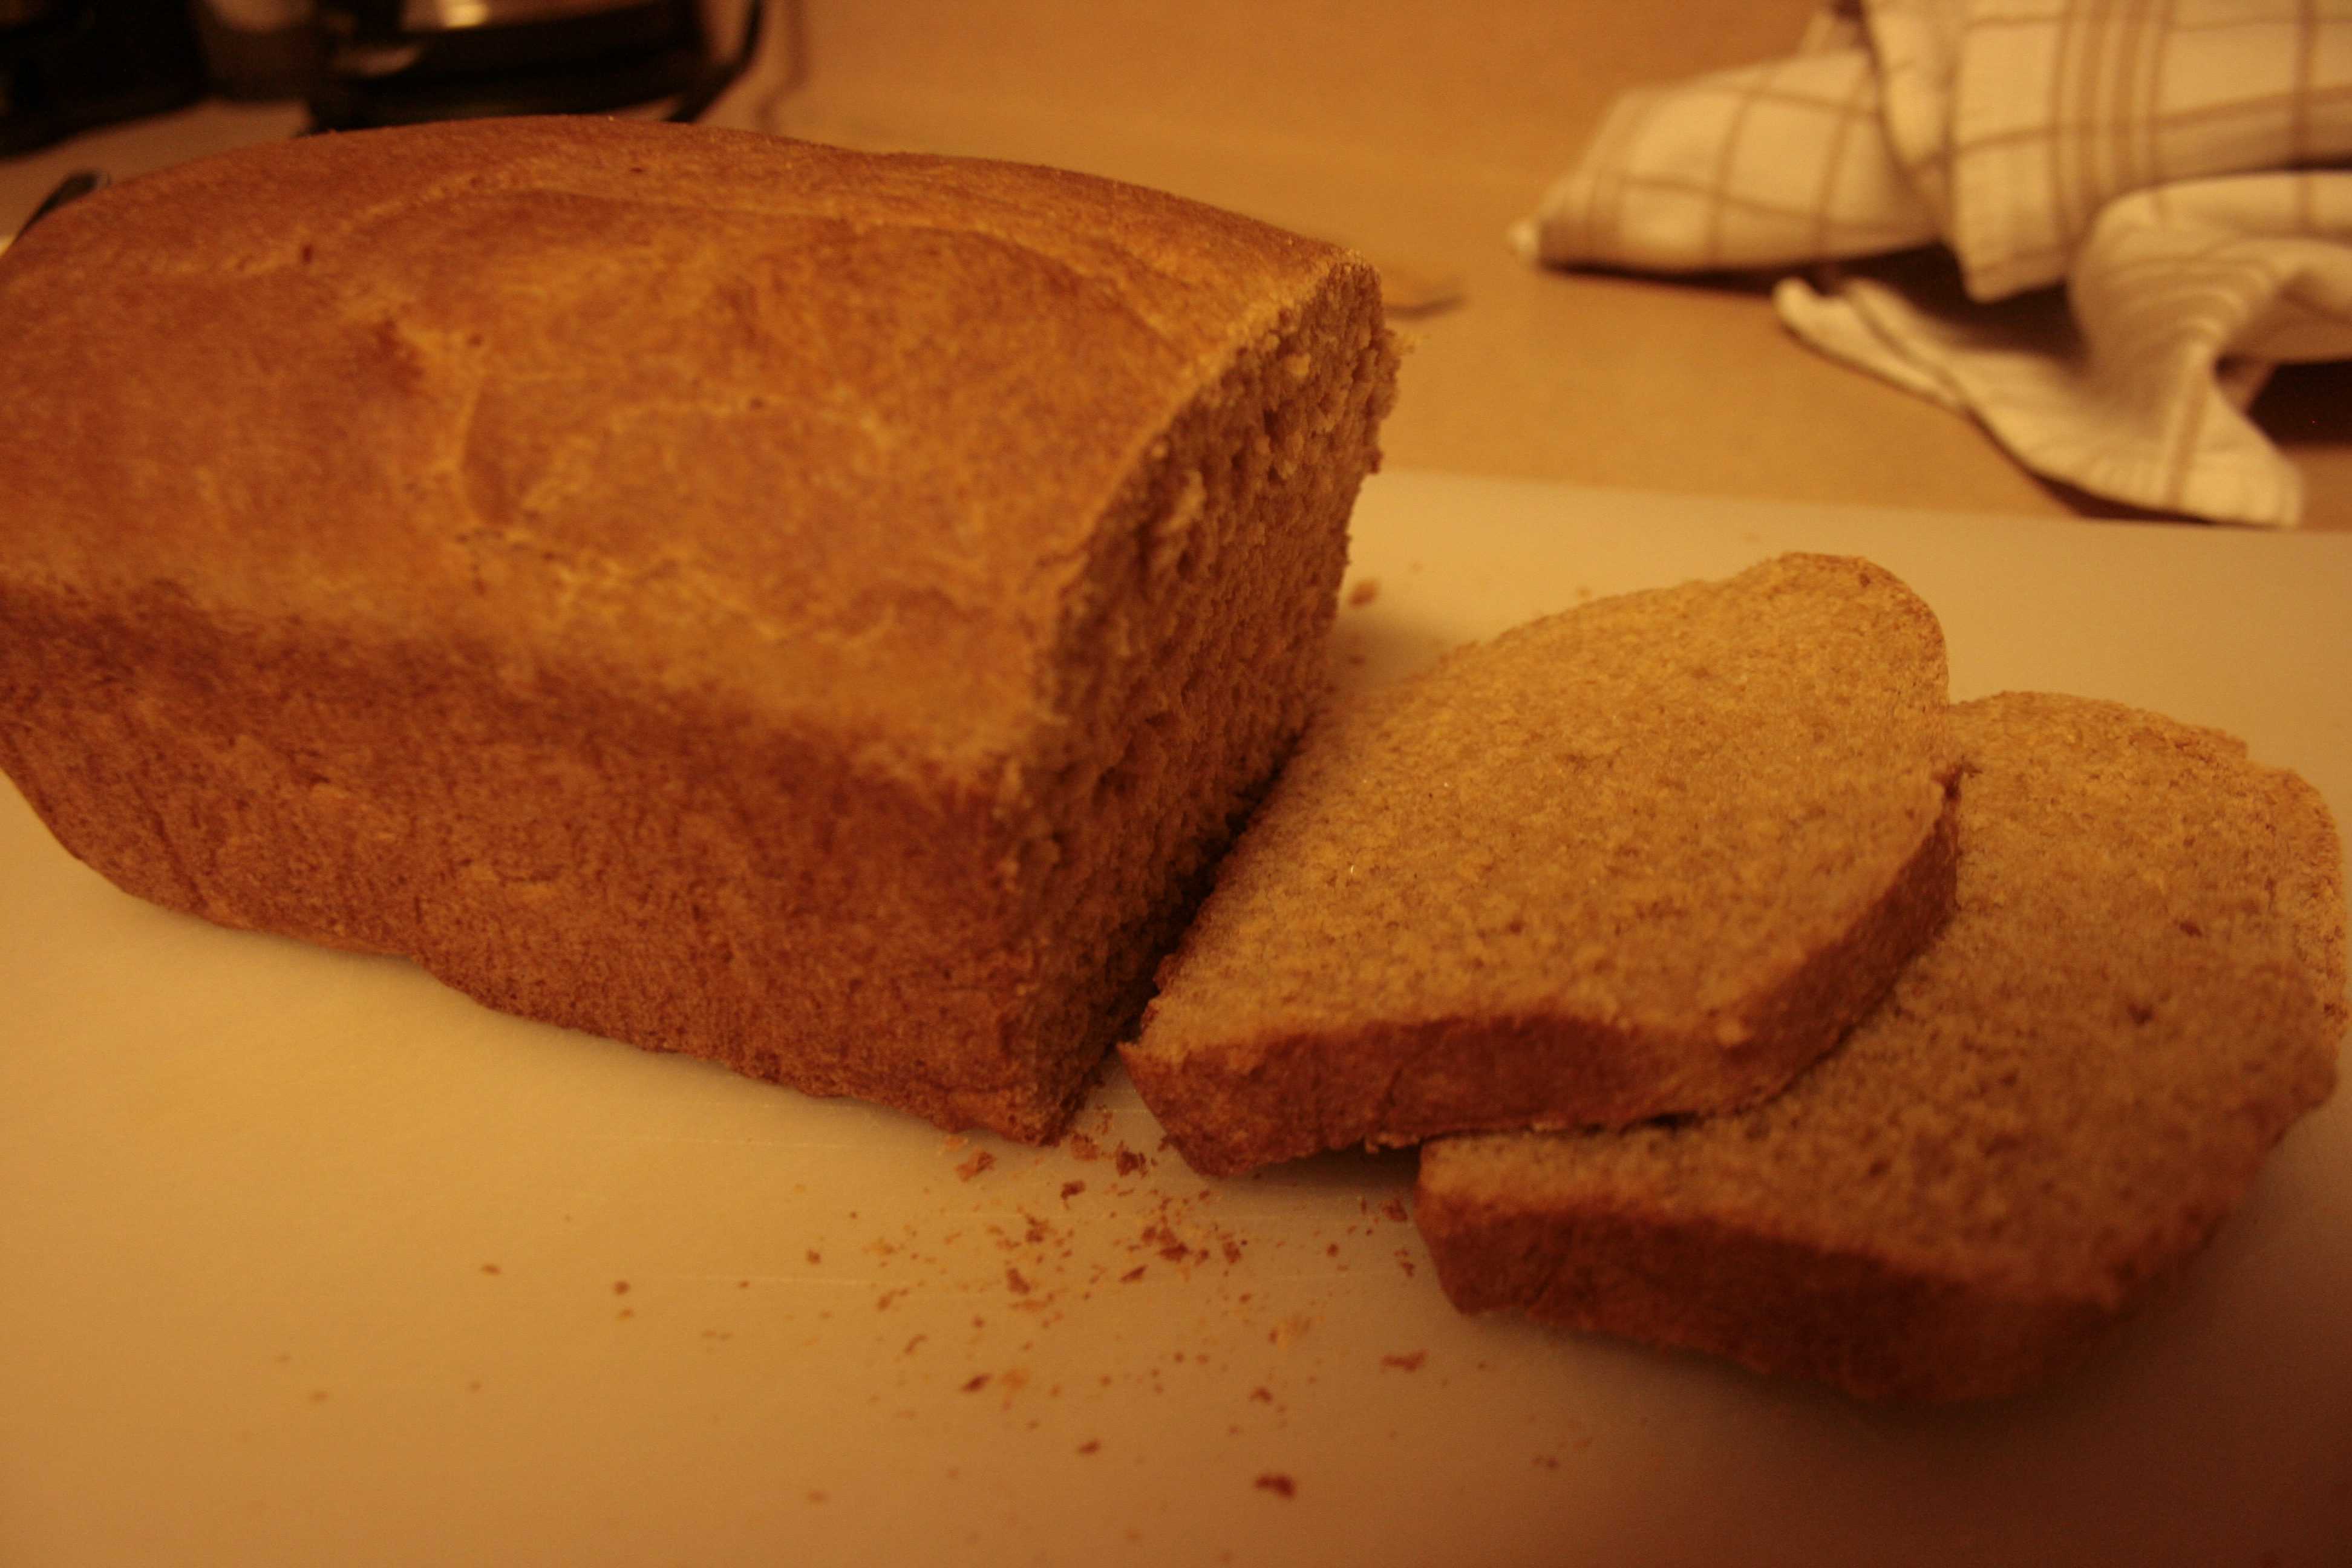
I have been having so fun much in the kitchen trying out new recipes since we got our new WonderMill! I am finding that baking with freshly milled flour is not as difficult as I feared and, with a little tweaking and a few tips from the experts, the recipes I used to make with store bought flour now have a whole new depth and dimension to them. The flavors are fuller and richer and breads come out much softer than I anticipated. It is strange how they can be softer and yet denser at the same time –which makes for a much better bread for spreads, meats and cheeses. They hold together nicely and you can go a little “Dagwood” with the lunch meat without them falling apart.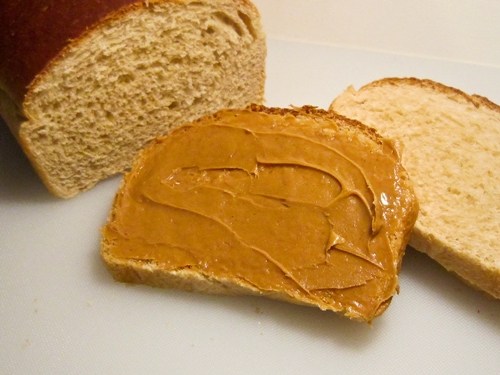
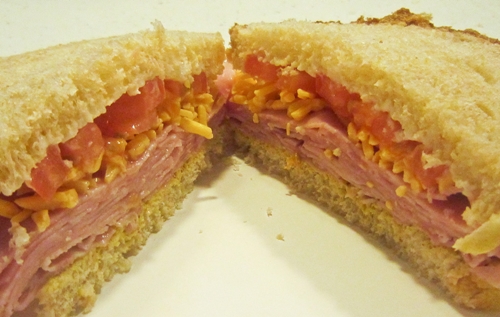
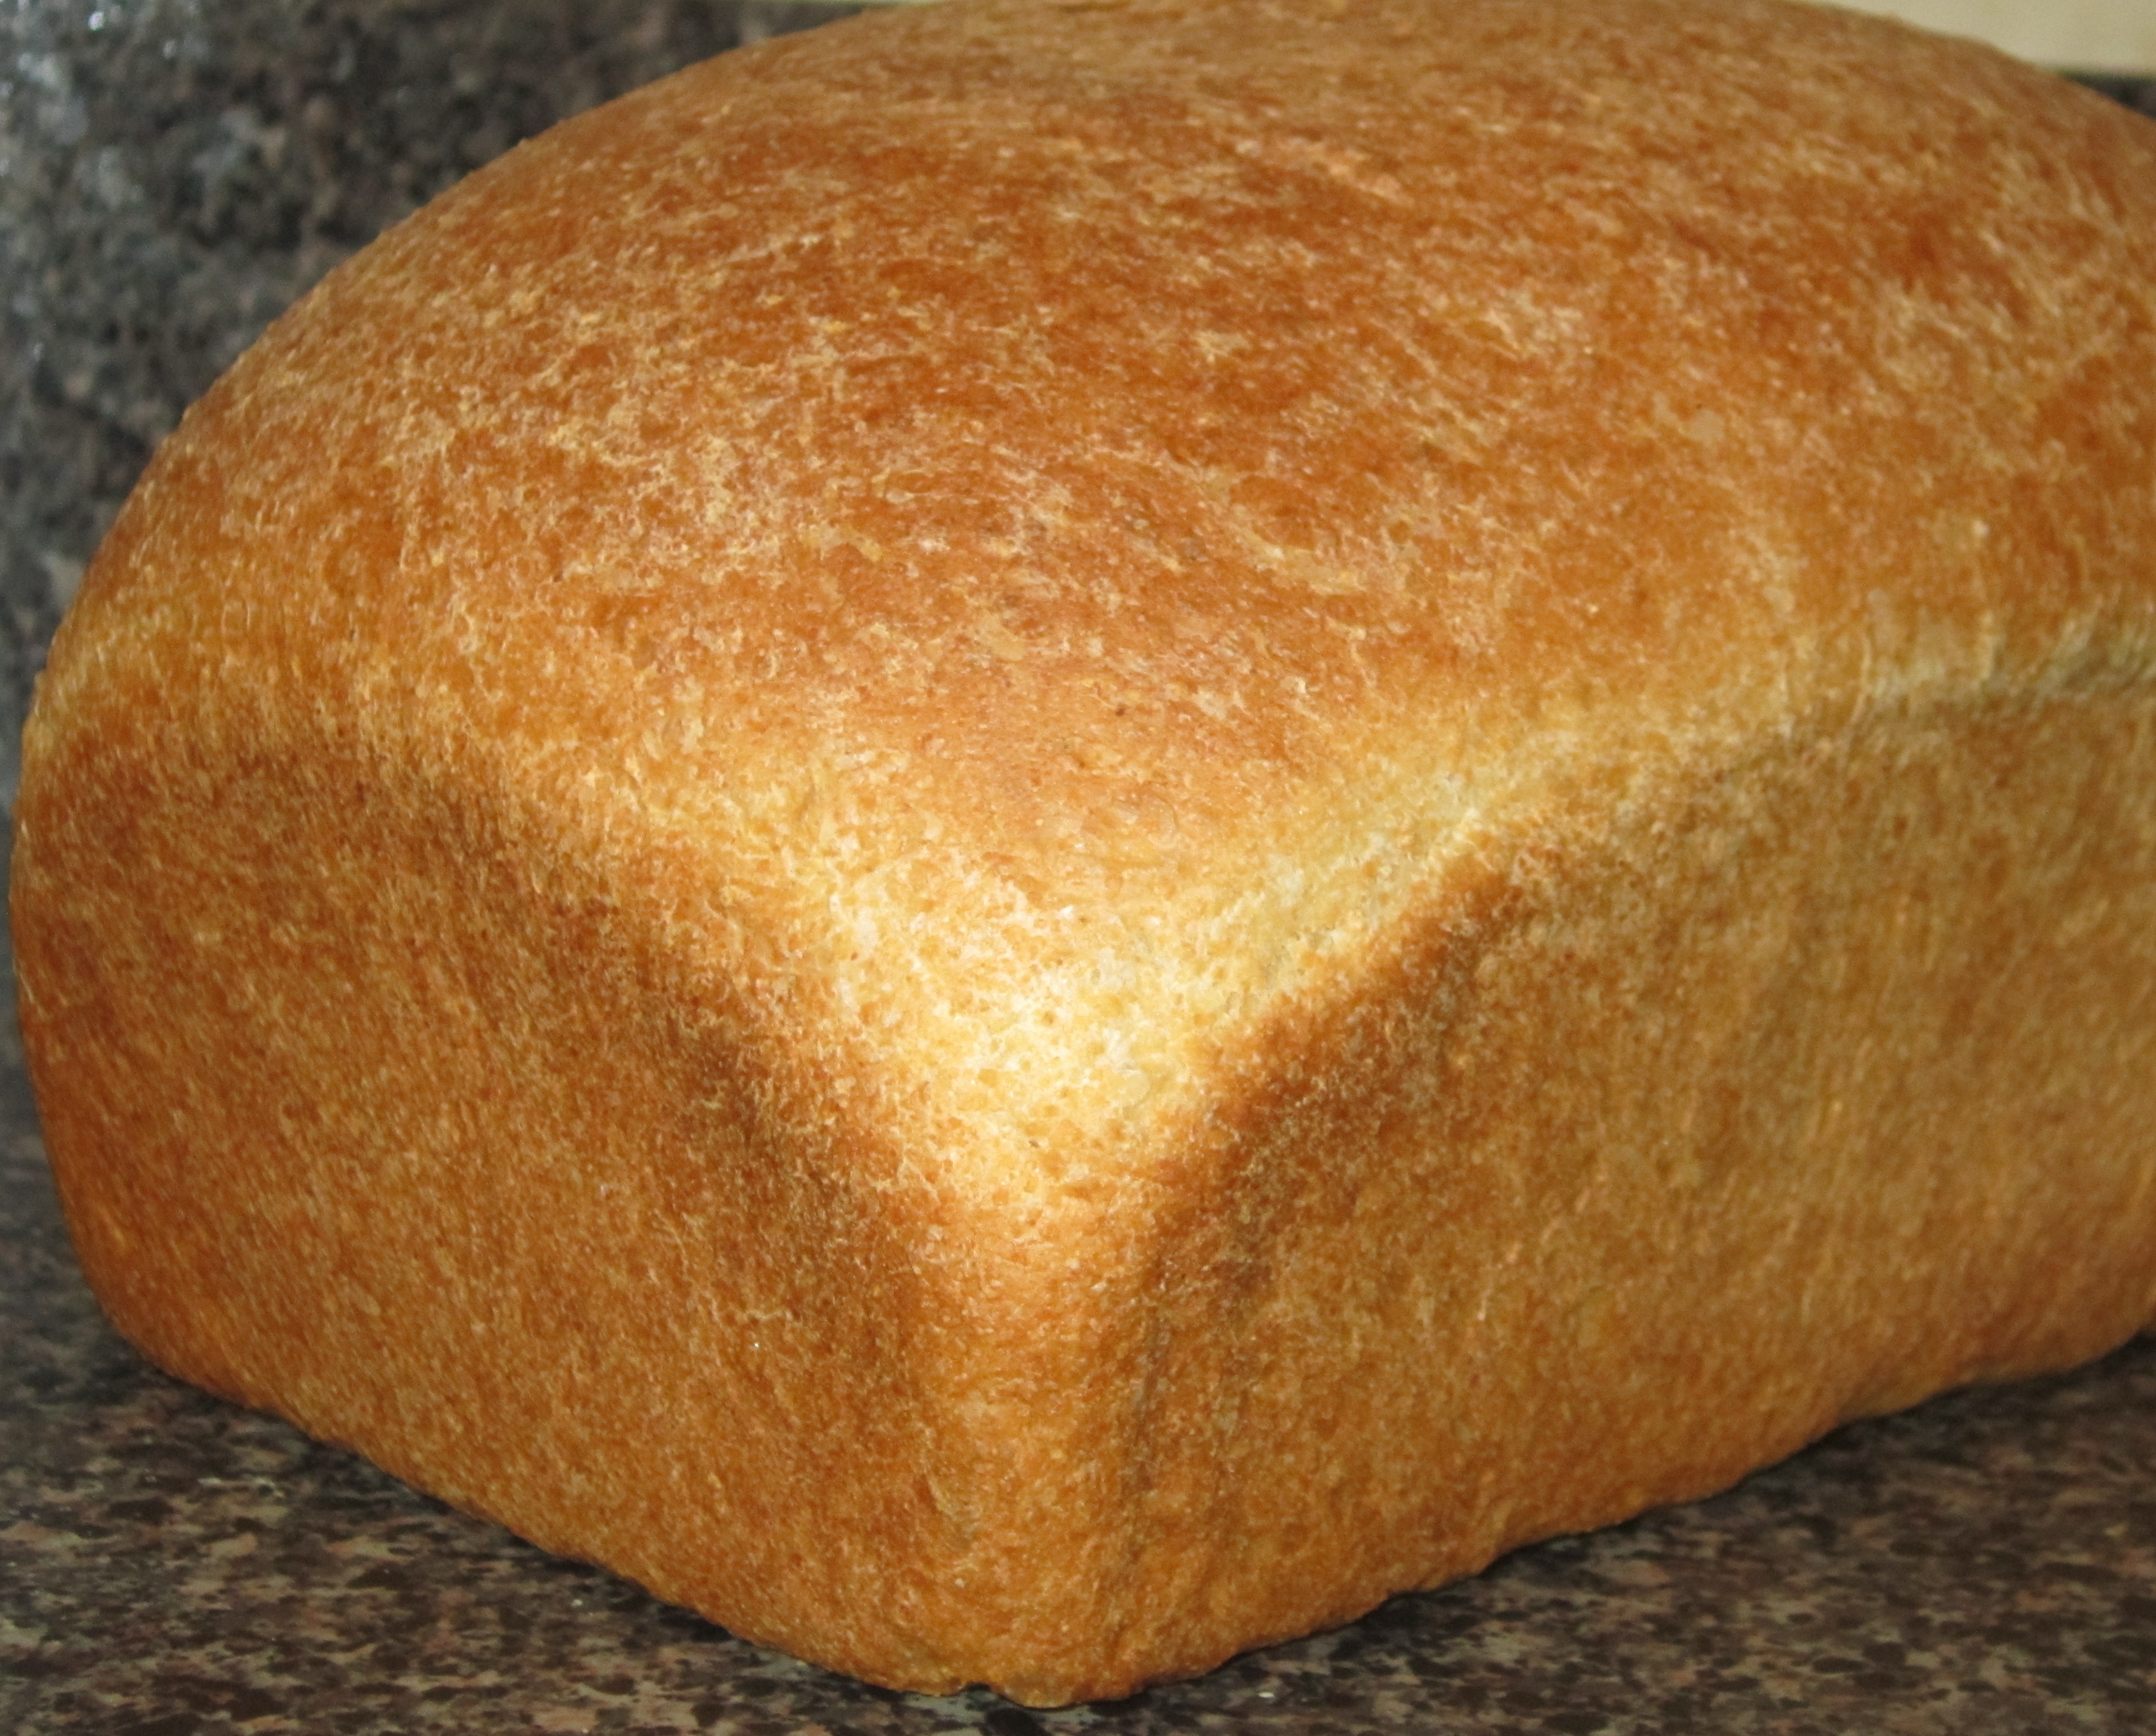
This recipe started with this awesome sandwich bread recipe that I made quite by accident once, the Happy Accident Sandwich Bread which uses store bought all purpose flour. I recently modified it to use freshly ground hard white wheat in place of half the AP flour, added some vital wheat gluten, and it turned out fantastic! It did not rise quite as high but I expected that (I mean it’s whole wheat, right?). It is a little sweet (but you can always reduce the sugar and/or honey) and it is WONDERFUL with a good honey roasted or maple cured ham or turkey and some smoky cheddar or provolone cheese. Spread on a little Dijon mustard, add a slice of tomato, and you have something incredible to behold! You have a DAGWOOD.
- 2 ½ teaspoons instant (quick rise) yeast – if substituting with active dry, see Notes below
- 1 ½ cups warm water (about 110°F)
- 3 cups freshly ground hard white wheat flour (cooled to room temperature)
- 3 cups all purpose flour – see Notes below
- 2 tablespoons vital wheat gluten
- 2 tablespoons sugar – see Notes below
- 3 tablespoons dry (powdered) milk
- 1 ½ teaspoons salt
- 4 tablespoons softened butter (Do NOT substitute with margarine! Use REAL butter.)
- ⅔ cup warm water mixed with ¼ cup instant potato flakes – see Notes below
- ¼ cup honey – see Notes below
- 2 tablespoons melted butter (for brushing on)
- Prepare & Set Aside:
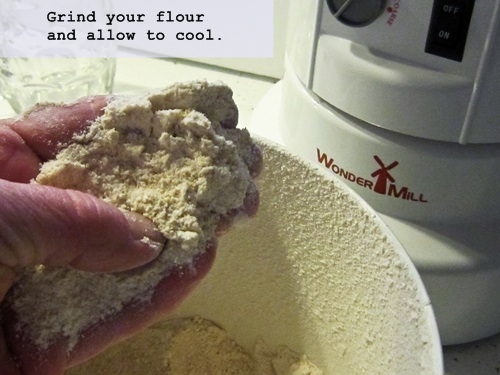
- Grind the wheat berries on the bread setting preferably the day before so it cools. If needed, though, you can stick your freshly ground flour in the freezer for a few minutes to flash cool.
- In a large bowl, whisk together vital wheat gluten and the whole wheat flour and all purpose flour.
- In a small bowl, measure out the proper amounts of dry milk, sugar, and salt.
- Dissolve potato flakes in warm water, stir (or water down leftover mashed potatoes -- see Notes).
- Soften butter.
- Measure out the honey.
- Set up stand mixer and add yeast and warm water in the mixer bowl. Stir until dissolved. - Add In:
- Dry milk, sugar, and salt mixture.
- Flour (holding back about 1 ½ cup until you are sure you need it -- you might not).
- Softened butter, potato mixture, and honey.
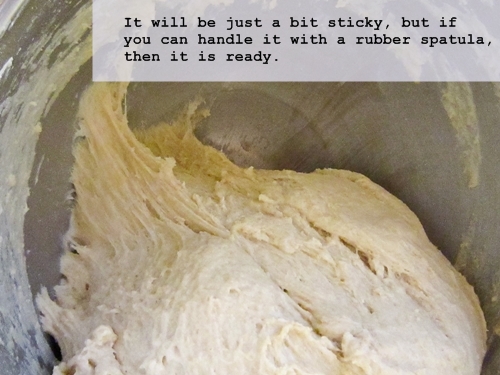
- Turn the mixer on low and mix 3-5 minutes until well combined. The dough should be wet & sticky.
- Let dough rest for 5-10 minutes before proceeding. Check to make sure it is still slightly sticky. - Knead:
- After resting time, turn the mixer back on and slowly add more flour until it starts to pull away from the bowl. It is okay if it sticks to the bottom a bit. Add extra flour only if needed, in very small amounts, and stop when it still sticks to your fingers a bit, but not to a rubber spatula. If you can handle it with a spatula, it is ready.
- Set timer and knead on low for about 8 minutes.
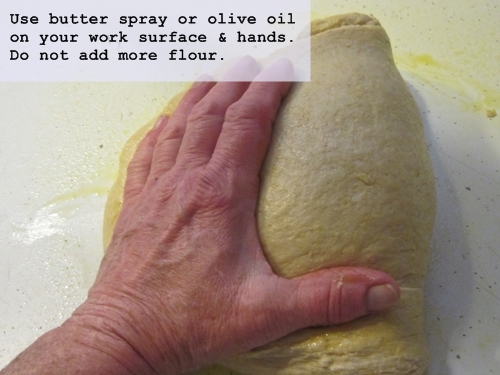
- Using butter spray or olive oil, grease your surface and your hands to handle the sticky dough. Do not add extra flour at this point.
- Hand knead the dough 8-10 times and shape into a ball. Don’t over knead.
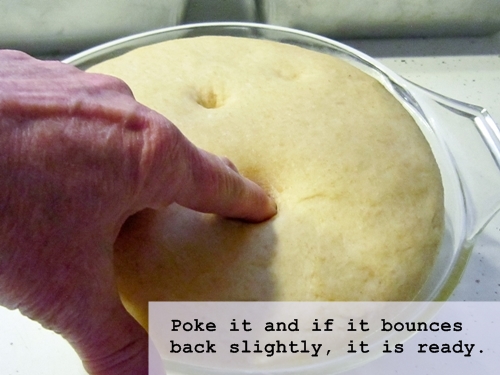
- Place dough ball in an oiled bowl, cover loosely and place in a warm, draft-free spot. TIP: If your kitchen is cool, turn your oven on for 2-3 minutes and then turn it back off. Let your dough rise in the slightly warm oven. - Rise:
- Allow to rise for about 90 minutes until the dough springs back slightly when poked with your finger.
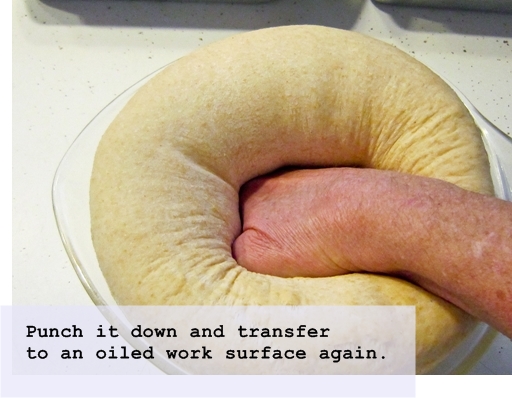
- Oil your work surface and hands again, punch down the dough and roll it out of the bowl using a spatula if necessary.
- Flatten the dough into a rectangle about ½ an inch thick and work out as many bubbles are you can by pinching & poking them.
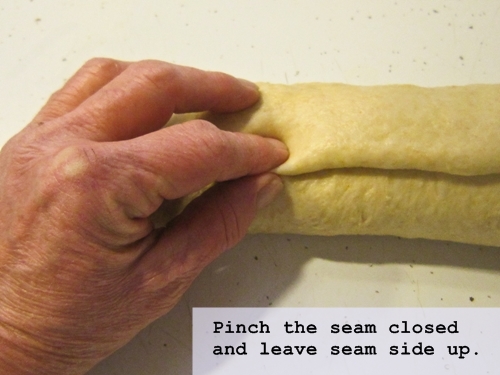
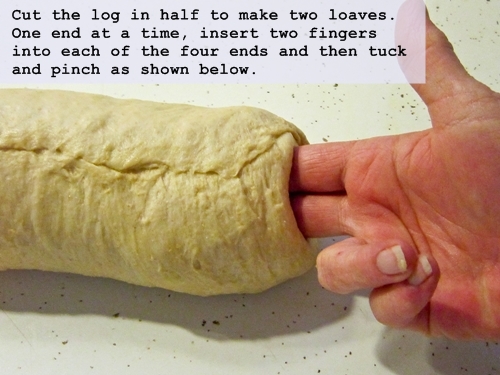
- Starting with a short side, roll the dough into a log and cut it in half to create two loaves.
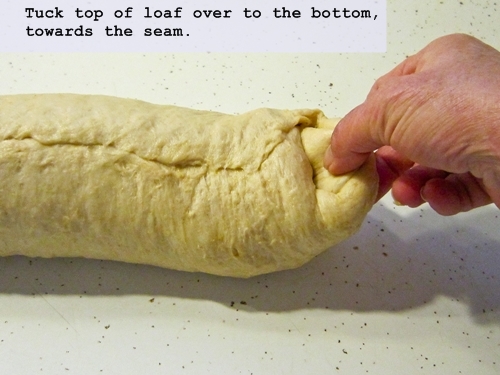
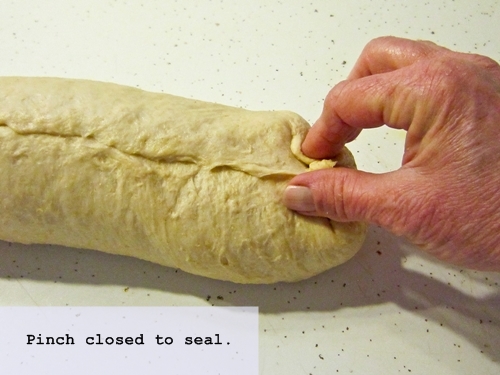
- Poke in each end, tuck the ends over and pinch closed on the underside (see photos below).
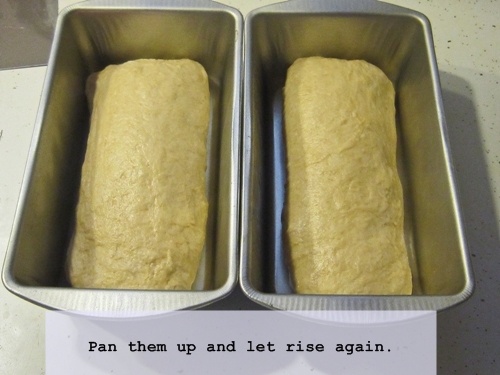
- Lightly oil bread pans and position the loaves seam side down and press to shape.
- Cover loosely and let rise for another 75-90 minutes until the tops of the loaves are at the about the same level as the pans. They will likely NOT double in size the way dough made with store bought flour will but they will rise further in the oven as they bake. - Bake:
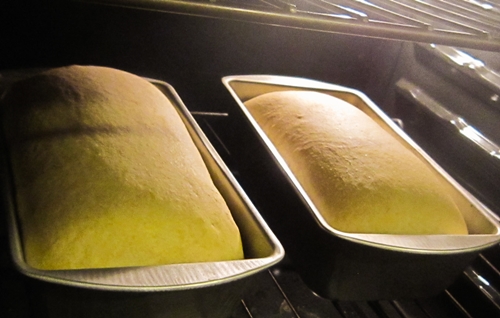
- Preheat oven to 400°F.
- Bake 5-6 minutes and reduce the oven temperature to 350°F
- Bake an additional 20-24 minutes until a dark rich, golden brown and they sound hollow when tapped.
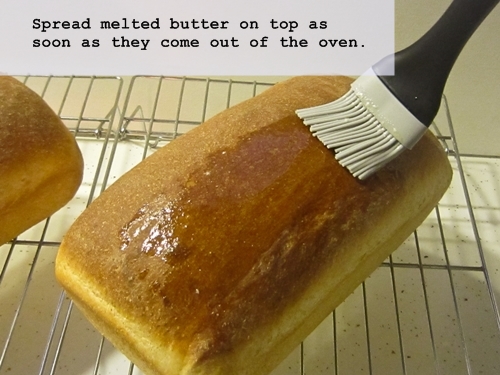
- Remove from the oven and roll immediately on to cooling racks.
- Brush with melted butter or rub with a butter stick.
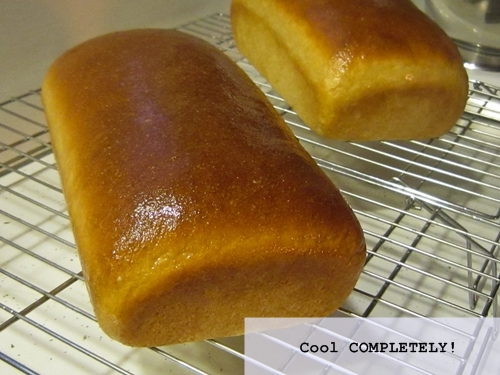
- Let cool COMPLETELY (overnight is best) before slicing.
You can use all wheat flour if you like, but it will make for a denser, heavier loaf.
You can use all AP flour for a lighter white bread, but if you do, skip the wheat gluten.
For a less sweet wheat bread, reduce or eliminate the sugar and/or honey.
You can substitute plain leftover mashed potatoes for the potato flake mixture but water it down just a tad. You will need just under a cup of plain, runny mashed potatoes.

 This bread is perfect for nut butters, jams & jellies, and as french toast. You can also add cinnamon and raisins or crazens to the dough just before rolling it up. It makes for a delightful thick sliced toast! Enjoy!