

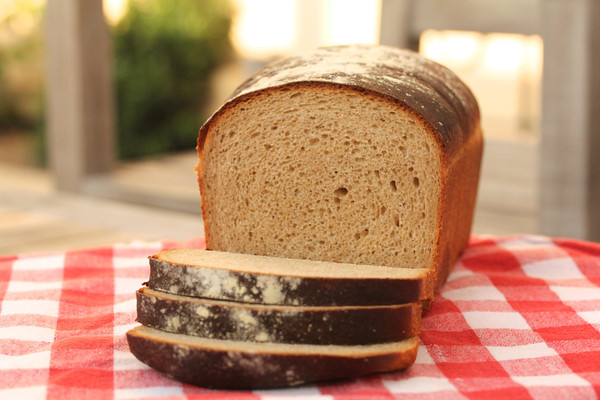
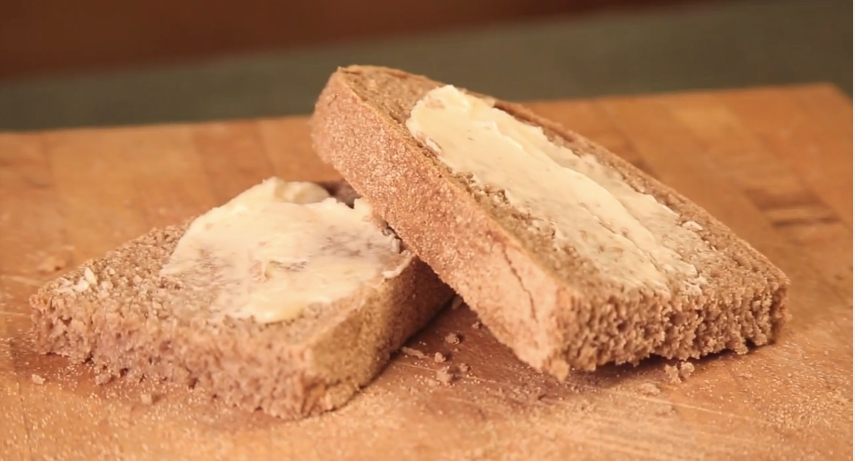
This transitional whole-wheat sandwich bread is perfect when you are trying to add whole grains to your diet but are having a hard time adjusting your palate to the stronger flavor. The dough is about 56% whole-wheat flour and 44% bread flour.
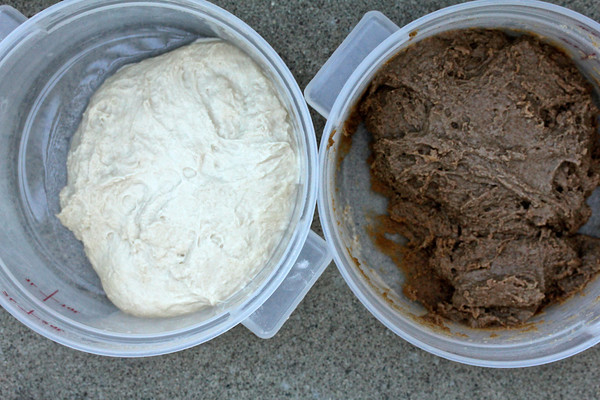
This recipe includes both a soaker made with the freshly ground whole wheat, and a biga (pre-ferment) made with unbleached bread flour. Both the biga and the soaker are made a day in advance so some advance planning is required, but it is well worth it.
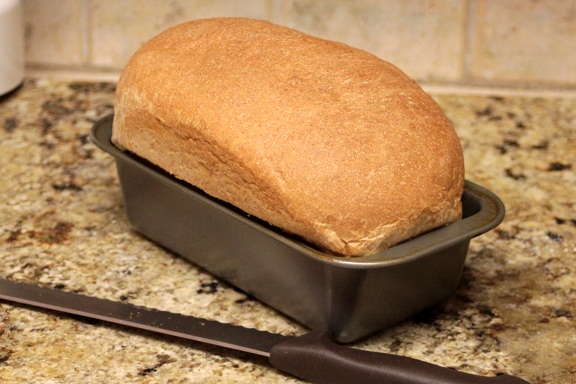
This dough is really easy to handle, and can be made into either a sandwich loaf or a freestanding loaf. We liked it for sandwiches and morning toast with butter. With whole-wheat sandwich loaves, I sometimes have trouble judging when the bread is ready for the oven, and sometimes the loaf rises unevenly or collapses a little after I put it in the oven. In this case, the bread rose beautifully and still had plenty of oven spring left once in the oven.

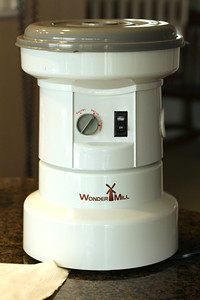
I had fun trying out my new grain mill for the first time and this recipe was perfect for freshly milled wheat. I was a little nervous, but milling the whole-wheat flour was super easy. I weighed the wheat berries, poured them into the running mill, and voila, a few seconds later, I had flour. Why did I not try this before?
If you’d like a higher percentage of whole wheat in this bread, you can incrementally substitute the whole wheat flour for the bread flour in the biga, but you will need to adjust the water to accommodate the bran, which absorbs more water than bread flour.
Adapted from Peter Reinhart’s Whole Grain Breads
- SOAKER:
- 227 grams whole wheat flour
- ½ tsp salt
- 198 grams whole milk
- BIGA:
- 227 grams bread flour
- ¼ tsp instant yeast
- ¾ C filtered water
- FINAL DOUGH:
- All of the soaker
- All of the biga
- 56.5 grams whole wheat flour
- ⅝ tsp salt
- 2¼ tsp instant yeast
- 2¼ T honey
- 1 T unsalted butter, melted
- TO MAKE THE SOAKER:
- Mix the flour, salt, and milk in a small bowl for about a minute. Cover with plastic wrap and allow it to sit at room temperature for 12 to 24 hours.
- TO MAKE THE BIGA:
- Mix the flour, yeast, and water to form a shaggy ball. Knead by hand until for about two minutes until the ingredients are fully incorporated.
- Let it rest for 5 minutes, and then knead again for for another minute.
- Hint: Use wet hands to keep the dough from sticking.
- Place the dough in a clean bowl, cover with plastic, and refrigerate for 8 hours to 3 days.
- TO MAKE THE FINAL DOUGH:
- Remove the biga from the refrigerator about 2 hours before mixing the dough.
- Break the soaker and biga into small pieces and place them in the bowl of a stand mixer.
- Add the rest of the dough ingredients and mix with the dough hook for about two minutes on low.
- Once all of the ingredients are incorporated, mix on medium low for about 3 minutes. Adjust the flour or water as needed to make a slightly sticky dough.
- Knead another 3 to four minutes and then let the dough rest for 5 minutes.
- Knead for one more minuted and then form the dough into a ball and place it into a lightly oiled bowl or dough rising bucket. Spray the top with spray oil. Cover and let rise until it has grown about 1½ times its original size, about 45 to 60 minutes.
- Form the dough into a loaf and place it into an oiled 8½ by 4 inch loaf pan.
- Cover loosely with plastic wrap and let rise for about 45 to 60 minutes, until it crests over the top of the loaf pan.
- While the loaf is rising, preheat the oven to 425 degrees F.
- Bake the loaf for 20 minutes, rotate the loaf, and loosely tent with foil if it is getting too brown.
- Bake another 15 to 20 minutes, until the interior reaches about 195 degrees F.
- Cool on a rack for at least an hour.


5 Responses to Transitional Whole Wheat Sandwich Bread