

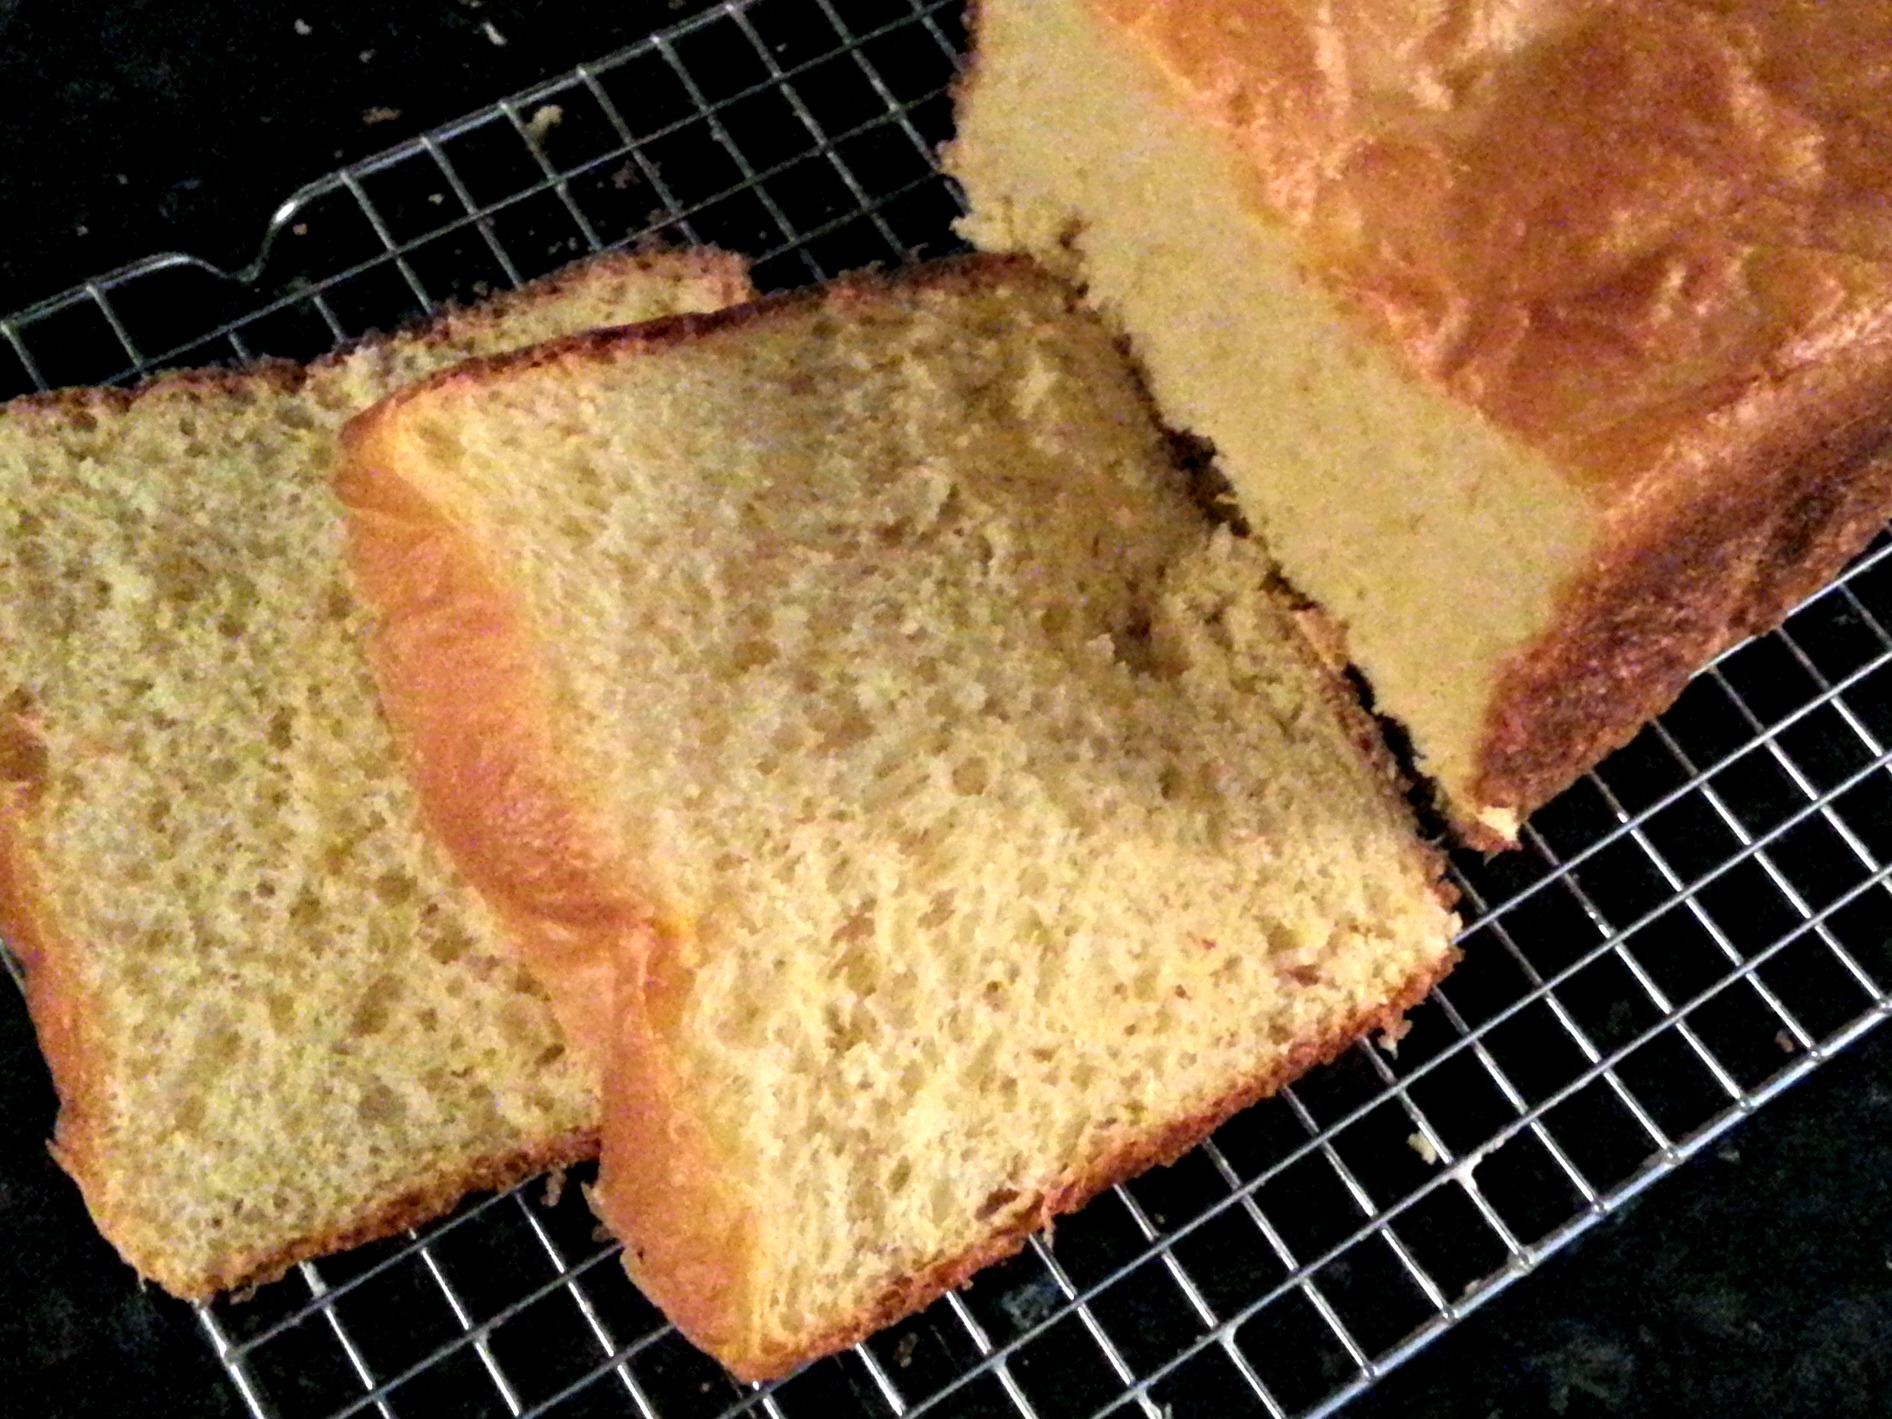
A few weeks back when I first took on the WonderMill Grain Mill Wagon Challenge, I was excited but admittedly apprehensive. I had never baked with freshly ground flour before and had just barely mastered baking a few things with store bought flour. A little research revealed a few basic tips that led to success on my very first try. Later, I will share all those tips with you in an upcoming blog post over at my place on Homestead Chronicles. For now though, let’s move onto these incredible Honey Butter Dinner Rolls that double as Slider Buns. Yes, you read that right! This is a dinner roll that works as a sandwich bun! I was SO excited when it worked!
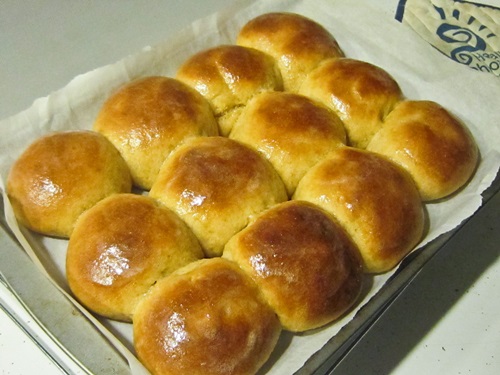
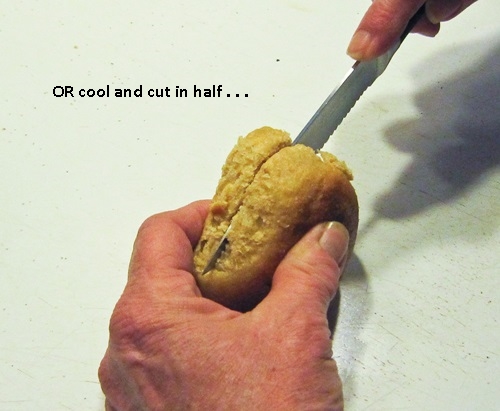
Since there are only two of us in our household, it takes a while to use up a dozen dinner rolls. I love this recipe because they are soft and delicious right out of the oven, and once they are cool, you can cut them in half and use them as slider buns. It is a great way to use up the leftover rolls.
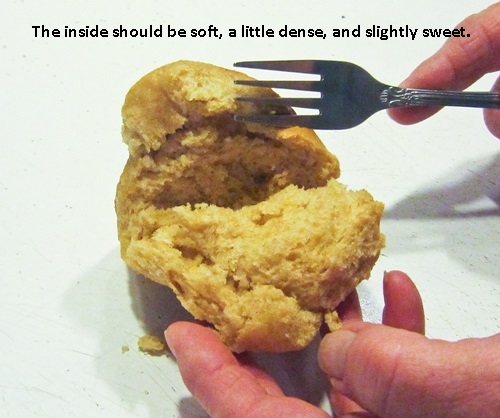
Yes, I admit this recipe is fairly challenging and the rise times are long, but it is OH SO WORTH the wait and the effort! I promise.
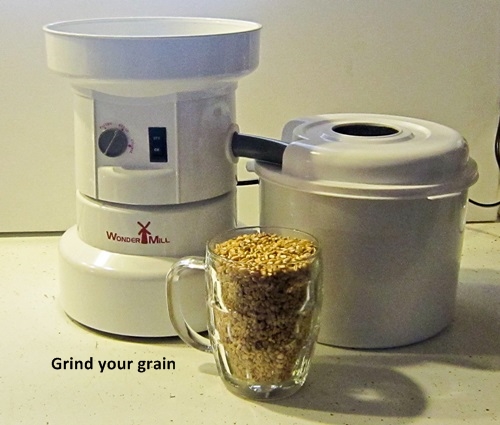
- 2⅔ cups freshly ground hard white wheat flour (you will need about two cups of berries)
- 2½ teaspoons instant yeast*
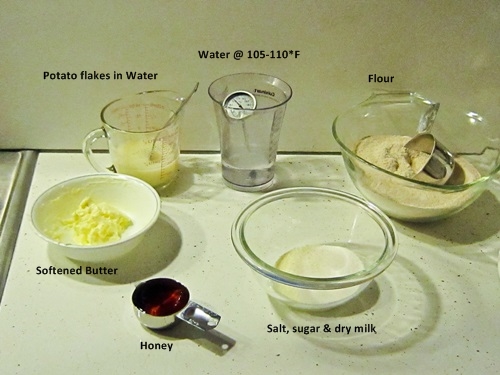
- ½ cup warm water (about 105-110°F)
- 3 tablespoons dry powdered milk
- 2 tablespoons sugar
- 1½ teaspoons salt
- ¼ cup instant potato flakes dissolved in ⅔ cup lukewarm water**
- ¼ cup honey
- 4 tablespoons softened butter (for the dough)
- 1-2 tablespoons melted butter (to brush the finished rolls/buns)
- Prepare & Set Aside:
- Grind the wheat berries on the bread setting.
- In a small bowl, measure out the proper amounts of dry milk, sugar, and salt.
- Dissolve potato flakes in warm water, stir (or water down leftover mashed potatoes**).
- Soften butter.
- Measure out the honey.
- Set up stand mixer and add yeast and warm water in the mixer bowl. Stir until dissolved. - Add In:
- Dry milk, sugar, and salt mixture.
- Flour (holding back about half a cup until you are sure you need it -- you might not).
- Softened butter, potato flakes in water, and honey.
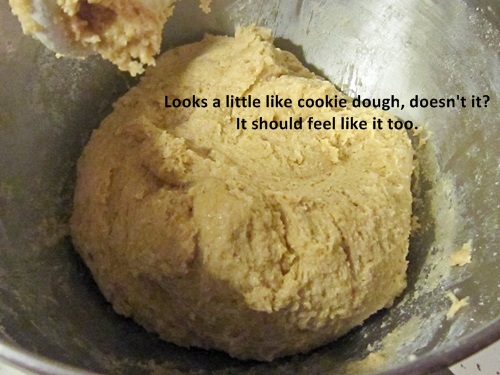
- Turn the mixer on low and mix 2-3 minutes until well combined. The dough should be wet & sticky and resemble cookie dough. - Knead:
- Once combined, set timer and knead on low for 3-4 minutes. Let the dough rest 5-10 minutes to allow the flour to soak up the moisture and then check to make sure it is still slightly sticky. Add extra flour only if needed, in very small amounts, and stop when it is the constancy of cookie dough.
- Knead on low for another 4-5 minutes.
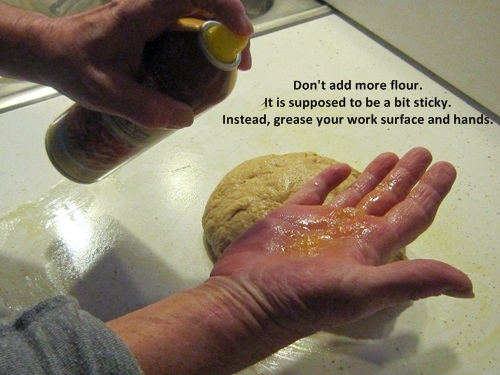
- Using butter spray or olive oil, grease your surface and your hands to handle the sticky dough. Do not add extra flour at this point.
- Hand knead the dough 6-8 times and shape into a ball. Don’t over knead.
- Place dough ball in an oiled bowl, cover loosely and place in a warm, draft-free spot. - Rise:
- Allow to rise from 75-90 minutes until the dough springs back slightly when poked with your finger. It will likely NOT double in size the way dough made with store bought flour will, but don’t worry. It will rise more during the second rise.
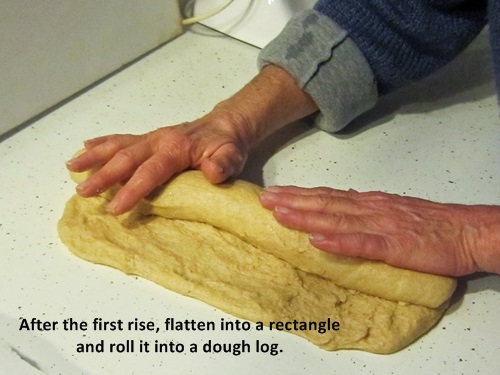
- Grease your surface and hands again, punch down the dough and roll it out of the bowl.
- Flatten the dough into a rectangle about ½ an inch thick.
- Starting with a short side, roll the dough into a log and cut into 12 pieces.
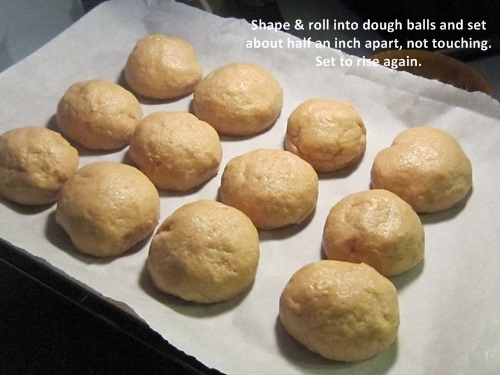
- Shape and roll each piece into a ball and place on a lightly greased or parchment covered cookie sheet. The dough balls should be about ½ an inch apart, not touching.
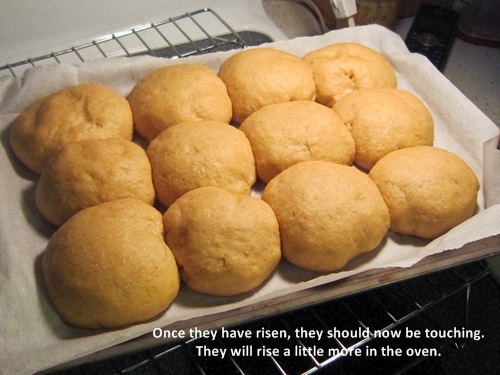
- Cover loosely and let rise for another 75-90 minutes until the dough balls are touching. - Bake:
- Preheat oven to 400°F.
- Bake rolls for about 7-8 minutes, turn the cookie sheet 180° (to ensure even browning) and reduce the oven temperature to 350°F
- Bake an additional 12-15 minutes until golden brown.
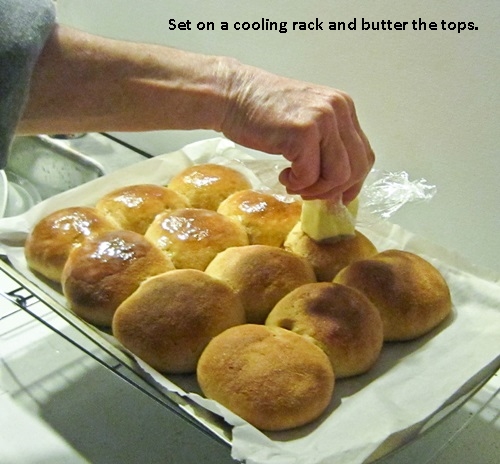
- Remove from the oven to a cooling rack.
- Brush with melted butter or rub with a butter stick.
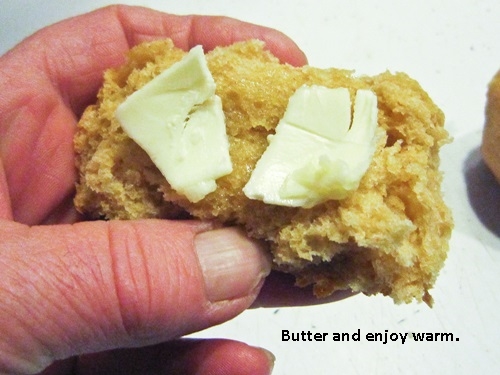
- Enjoy with dinner – fresh & hot right out of the oven and then use the leftovers as slider buns.
** You can substitute very runny leftover plain mashed potatoes for the potato flake mixture. Use a little less than a cup worth, but do make sure you have added water or milk and it is pretty runny. You may want to warm it tad before you mix it in.
Adapted from The Kneady Homesteader.
And here are a few photos of the process for you visual learners!


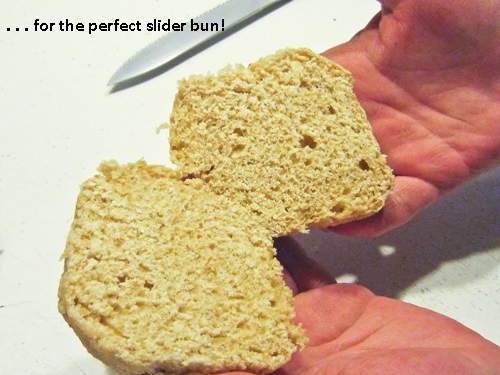 What could be better than a double duty dinner roll? We like hot ham with melted cheese, tomato, bacon, and mayo! OH MY! What would you pile on for yummy slider?


One Response to Pull Apart Honey Butter Dinner Rolls (and Slider Buns)